
HOLIDAY POSTER DEMONSTRATION
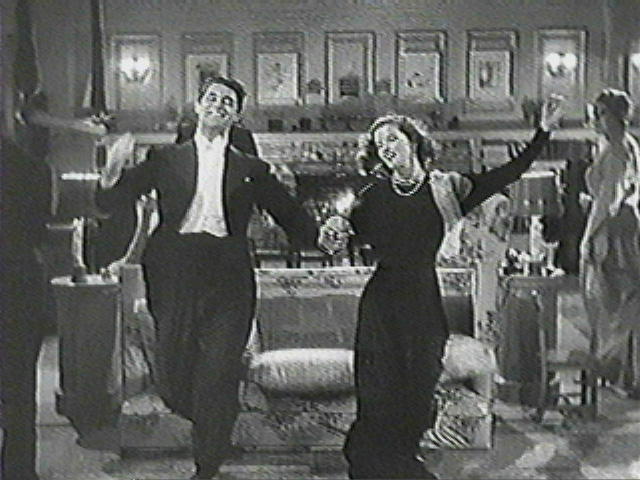
Finished Poster
Click to Enlarge
Process:
Gather Research Images by print material (scanning), by digital photography (down load images into JPG files), by internet research (download PICT and convert into Photoshop JPGs)
1. Scanning
2. Digital Photos

3. Internet Research
Create a Folder (go to FILE) on DESKTOP. Label.
Google. IMAGE
Capture images by pulling image to desktop over folder on MAC.
Go to Photoshop. Click Browser (File)
Select image you want.
Save as JPG in folder.
TO create a Poster ...
1. Open a new document in Photoshop.
File/New
Switch Pixel to Inches
Width 10, Height 16
Resolution 300dpi for Finished Poster, 150 working, 72 draft
Ruler document. View. turn on
2. Add color
Use Guide lines to lay out.
Tool on Marquee. Place cursor in ruler margin and drag to desired area.
Select area you may want to color. Use marquee within guide area to make active.
To select color. Go to color box in tool box or use color table. Find desired color and clilck on to make active.
Click on Paint Bucket in tool bar. Move bucket to active area and click. Note in top bar FOREGROUND and OPACITY
To adjust Color, you have many options.
ADJUSTMENT
Try Hue/Saturation, Color Balance, Brightness/Contrast.
3. Add Images
Make certain your JPG files in your research folder are the same dpi as your base document.
Click on jpg. Go IMAGE. Click on Image Size. DPI. YOu can adjust the size of the JPG in this box by converting Pixels to INches. Note Percentage. Note Constraint Proportions.
You make want to work on your image before importing it to the poster blank.
Open you image.
Click APPLE A (select all) or SELECT ... All
Click APPLE C (copy) or EDIT ... copy
Click APPLE N (new document) or FILE ... New
Click APPLE V (paste) or EDIT ... paste
Change color, change sizes, change texture, add layers, Distort,
COLOR
Marquee the area you want to change. Hue/Saturation. or Color Balance. or Brightness, etc.
Change Sizes. Marquee area. APPLE T or EDIT ... Free Transform. Once ON, pull down EDIT to Transform. Note Rotate, skew, distort, perspective. enlarge, etc.
TEXTURE. Marquee area. FILTER ARTISTIC. Experiment.
LAYERS Think about using multiple pieces of tracing paper and put one on top of each other. Layer can have opacity. Using the Layer tool bar in WINDOWS, you can adjust and change order.
4. Add Text
Text Tool in Bar
Click on CHARACTER in WINDOW. Note Type, Font, Tright T down, Color
Type and clilck CHECK in top bar.
Layer text. To change size and font, you need to check or approve previous text. Create a new NEW LAYER ... Layer new. Activate this in the Layer Bar. Then click on Text tool and adjust in Character box.
5. Custom images or print. In the case of the HOLIDAY POSTER, I used the title from the film. I printed it in true size by copying the layer to a new document. Click on the active layer in the LAYER BAR. Go to LAYER in top bar. DUPLICATE LAYER. Pull Down Menu to NEW. OK.
I printed this out and redrew. Scanned at dpi desire.

ROTATE Document.
IMAGE ... Rotate Menu CW.... Clock Wise CCW Counter Clock Wise Arbitrary.
Adjust position by using Guide for guide line. APPLE T Transform and twist. CHECK to approve.
SAVE
COPY Image. APPLE A,C.N
At the NEW DOCUMENT Prompt, Click on BACKGROUND CONTENT Menu : TRANSPARENT
Increase the Contract. IMAGE, ADJUSTMENT, BRIGHT
or APPLE L (level) or IMAGE, ADJUSTMENT, LEVEL
SAVE
Using MAGIC WAND TOOL from bar. Click on area you want to eliminate. Note tolerance (32 standard) Use the + tool to zoom IN or the - tool to zoom out. Or APPLE + or APPLE -. This enables you to clean up your work.
Use the Polygonal Tool to select. Marquee area you do not want. APPLE X for DELETE or EDIT ... cut.
Use the Eraser Tool to delete. Note BRUSH for harshness/softness and master diameter. Note opacity,
SAVE at psd, not JPG. PSD in format is a working layer. JPG in format flatten all layer and add a white background.
Here I eliminate pencil outline by using SATURATION ... light
I created a drop black shaddow by LAYER... Duplicate Layer in same document, not new one. Make this layer active. SATURATE ... dark. Then move layer with MOVE TOOL. Change layer order.
SAVE
Duplicate White Layer.
Select Color in bar. Paint Bucket.
COMBINE LAYERS LAYER ... MERGE VISIBLE. ... do not FLATTEN.
IMPORT TITLE to poster document by Drag Tool into document. Or, APPLE A, C on Title Image. Then click on poster dcoment. APPLE V and the title will be imported. Move to desired position. Use Guide Lines to help position. Use Move Tool.
To get rid of guides, either physically drag them back into the margin, or VIEW ... Clear Guides.
SAVE by going to FILE, Save AS. in this box, click on SAVE COPY. BACK UP FILE so you can continue to play with your poster.
GOOD LUCK.